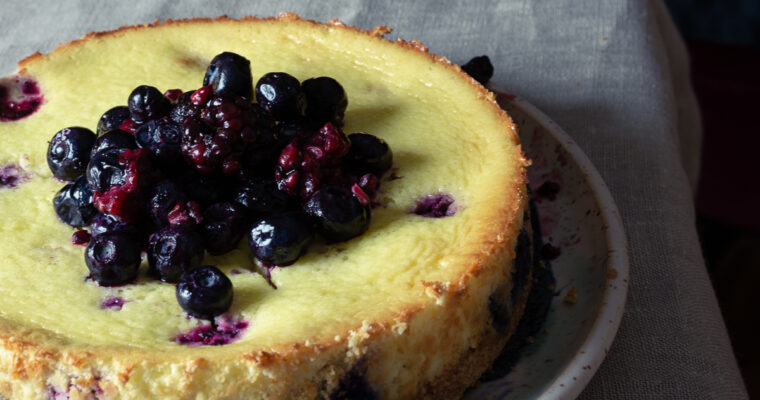
If you are looking for a last-minute awesome dessert recipe, do not search any further! This easy and fast-to-make baked cheesecake with berries is one you will definitely love. A few simple ingredients, a couple of minutes to prepare, and in less than an hour …
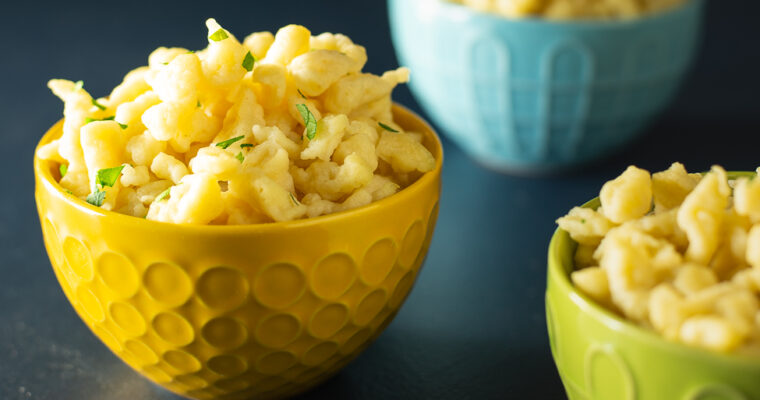
Nokedli, these delectable Hungarian egg noodles or dumplings make the perfect side dish. They need only a few everyday ingredients and are easy and super fast to make. These little dumplings (we call them nokedli or galushka) are very similar to the German spaetzle. They …
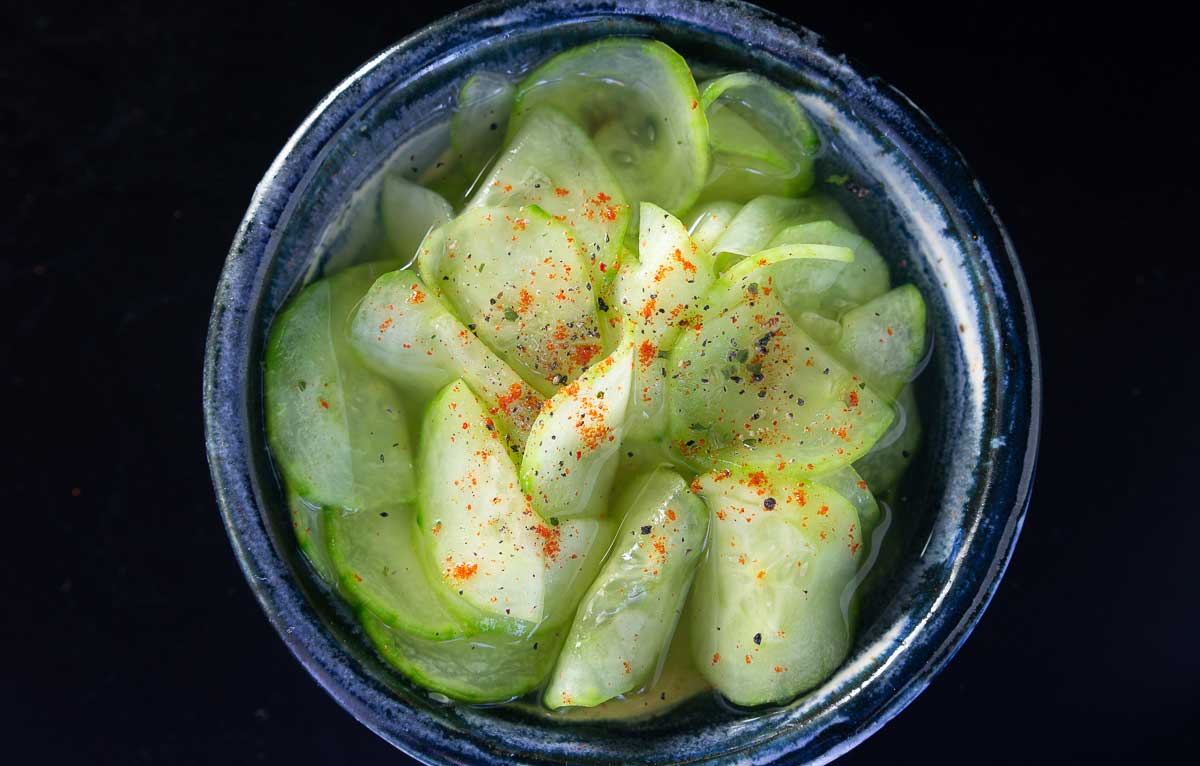
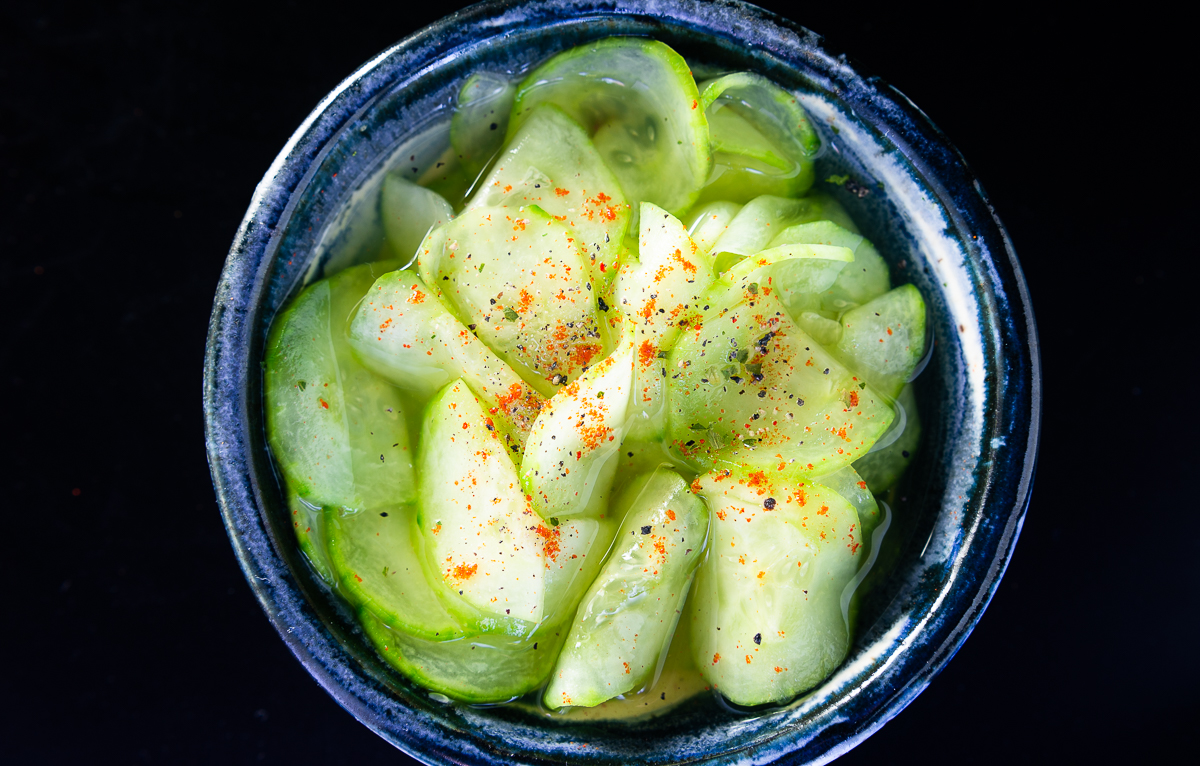
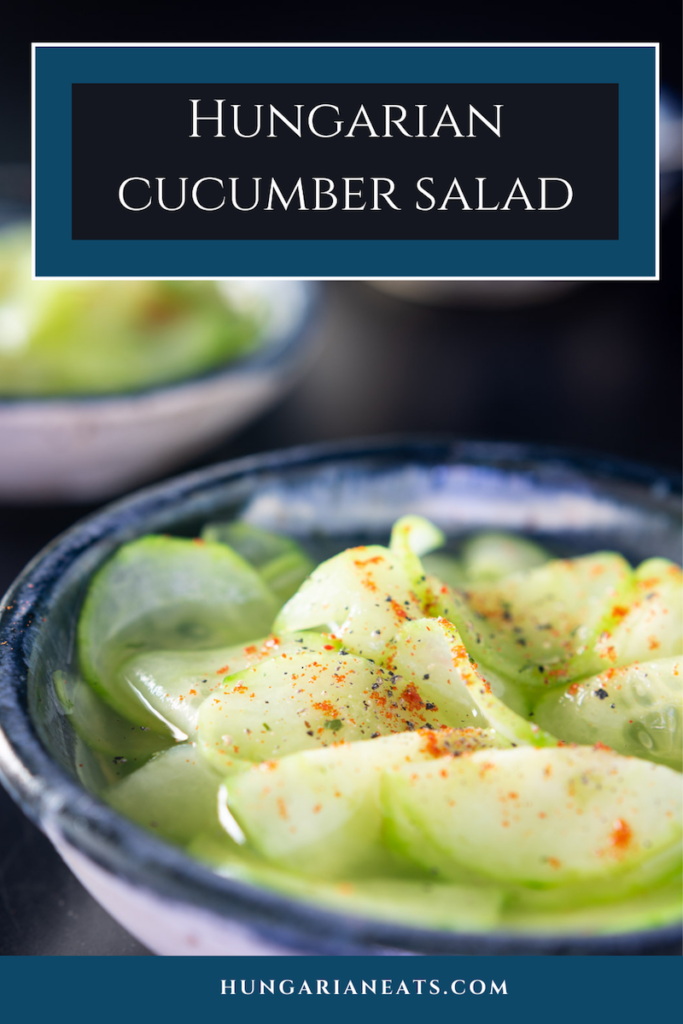
Hungarian cucumber salad is an extremely refreshing side-dish, which usually accompanies traditional main courses like chicken paprikash. It is served along with the main course and not before. In Hungary many meals with meat (or meat substitutes) are served with some pickles and/or a vinegary salad on the side. These acidic salads and pickles provide a nice balance to the meal, and also help digestion.
This cucumber salad is one of the classic Hungarian vinegary salads. It is easy to make, it needs only a few everyday ingredients, and of course, it is super delicious and refreshing. Every family has its best salad recipe. It could be made or served with or without a dollop of sour cream, fresh dill, onion, tomatoes, it is really up to you. We love this light and easy version that I am sharing with you here. I make this recipe with English cucumbers throughout the year, except late summer when I can find larger field or slicer cucumbers. These cucumbers look shorter and thicker than the English ones, and tend to have more seeds and thicker skins. As cucumbers are among the “dirty dozen” which means they contain more pesticide residue than other produce, try to get organic cucumbers whenever you can.
You can serve the salad right after mixing the brine with the cucumbers, but I highly recommend serving it after letting it rest in the refrigerator for at least 30 minutes.
I dedicate this post to the memory of Marika, who loved this salad.
Hungarian cucumber salad
Ingredients
2 English cucumbers
1 clove garlic, minced
1 tsp salt – mostly to prepare cucumbers
1.5 cups water
3 tbsp white vinegar – 5%
2 tsp powdered (icing) sugar
1 pinch red paprika powder
1 pinch ground black pepper
sour cream for serving – optional
Method
Wash and peel the cucumbers, discard the ends, and slice into very thin slices with a mandolin.
Place the cucumbers into a bowl, add the salt, and mix. Cover and put it aside for about 30 min.
In the meantime mix the water, minced garlic, and vinegar in a small bowl. Add the sugar gradually. The brine is not going to be sweet, it is just reducing the acidic flavor of the vinegar. Add more vinegar and/or sugar if you like. Add a pinch of red paprika and ground pepper.
After 30 minutes the salted cucumber will give off liquid. Remove the sliced cucumbers one handful at a time and gently squeeze out any extra liquid (you may wear single-use gloves, or squeeze with a large spoon). Discard the liquid.
Add the vinegar mix to the cucumbers, stir, cover, and put it into the refrigerator to chill for at least 30 minutes. Sprinkle the top with some red paprika, ground black pepper, and serve the cucumbers with some juice in small salad bowls on the side with the main dish. Enjoy!
Wash and peel the cucumbers, discard the ends, and slice into very thin slices with a mandolin.
Place the cucumbers into a bowl, add the salt, and mix. Cover and put it aside for about 30 min.
In the meantime mix the water, minced garlic and the vinegar in a small bowl. Add the sugar gradually. The brine is not going to be sweet, it is just reducing the acidic flavour of the vinegar. Add more vinegar and sugar if you like. Add a pinch of red paprika and ground pepper.
After 30 minutes the salted cucumber will give off liquid. Remove the sliced cucumbers one handful at a time and gently squeeze out any extra liquid (you may wear gloves, or squeeze with a large spoon). Discard the liquid.
Add the vinegar mix to the cucumbers, stir, cover, and put it into the refrigerator to chill for at least 30 minutes. Sprinkle the top with some red paprika and ground black pepper, and serve the cucumbers and some juice in small salad bowls on the side with a main dish. Enjoy!
Notes
The salad could be served right away, but the best is to serve it chilled.
You can add some green or red onions cut into small pieces, some thinly sliced tomatoes as well.
Try the chilled juice! It is extremely refreshing on a hot summer day.
You can put some sour cream on the table when serving, for those who like adding some to their salad.
The salad is served usually along with a main dish, like chicken paprikash, but it is just delicious by itself too, you will see. There is a high chance, that it is going to “disappear” from the salad bowls, if it is served earlier than the main course.
Field or slicer cucumbers are in season in Ontario and Quebec late summer – they are an awesome option for this salad. They tend to have bigger seeds, and thicker skin.
Leave a comment on the recipe page! Did you try this recipe? Let me and others know how you liked it by leaving a comment below.
Instagram – Did you make this or other recipe from the blog? Make a pic and share it with me onInstagram by tagging @realhungarianeatsand #realhungarianeats. I can’t wait to hear from you and see your creations!
Pinterest – You can find us on Pinteresttoo, if you would like to pin the recipe pics!
Have you been craving a delicious Hungarian chicken paprikash, but you don’t want a heavy stew with flour, sour cream and chicken skin? Do not look any further, this chicken stew is your recipe! It is so easy to make, uses a few everyday ingredients, …
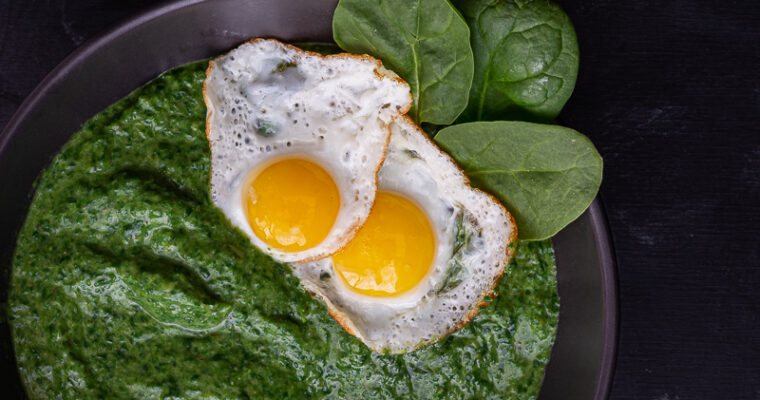
Hungarian creamed spinach with garlic (“spenót főzelék” or simply just “spenót”) is a traditional, easy and delicious spinach dish. What is “főzelék”? “Főzelék” is a special meal category in Hungarian cuisine, that has not even have an actual English translation. It is a kind of …
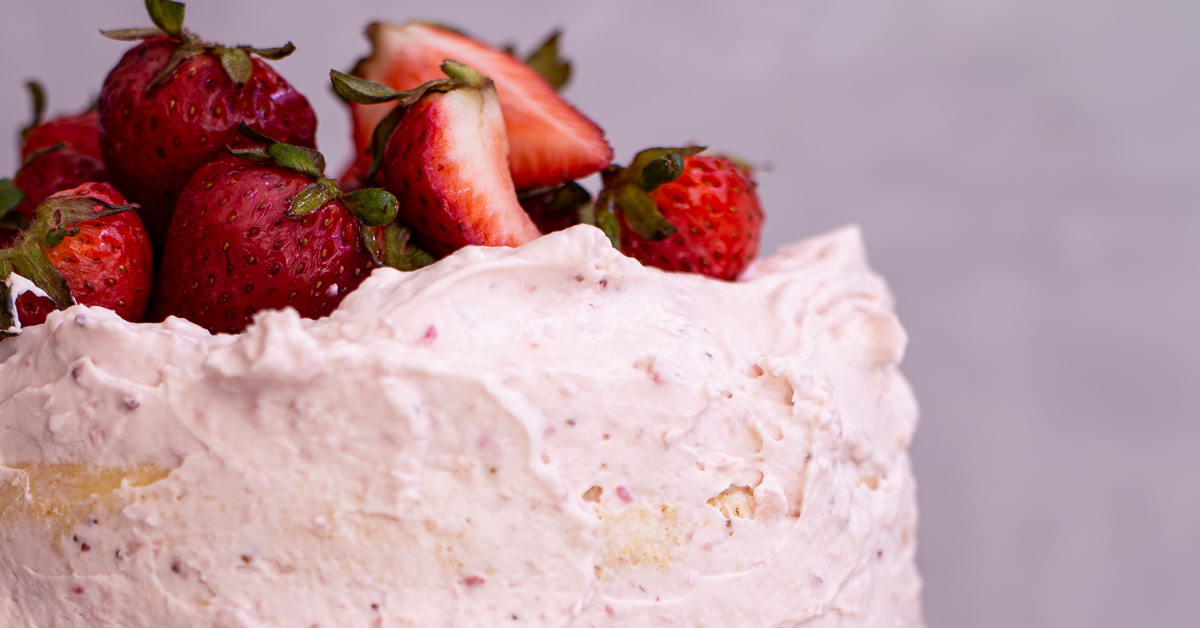
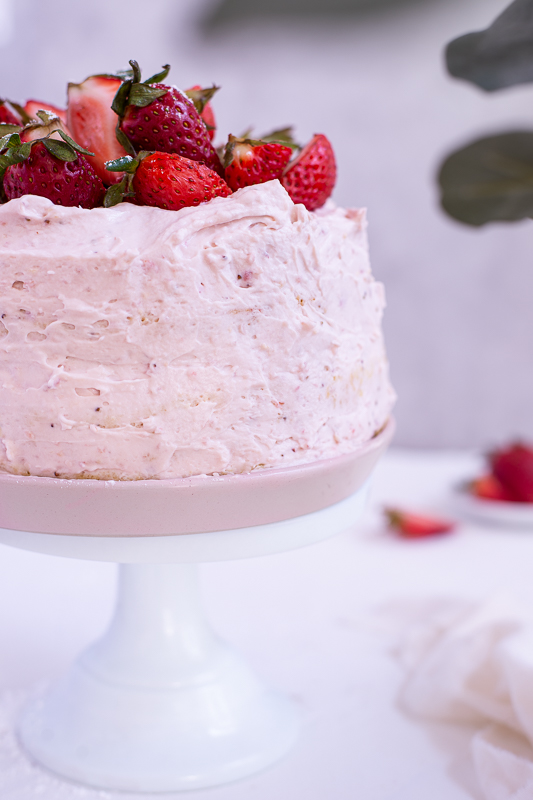
This strawberry mascarpone cream cake is really as heavenly as it looks. A few ingredients, two boxes of strawberries, and a wonderful spring dessert is ready to serve. If you are lucky to have strawberries all year round, this cake could be made at any time of course, but the best is to make it from fresh strawberries when they are in season.
Several years ago my daughter asked for a strawberry cake for her birthday. I wanted something that is creamy, made with only natural ingredients, contains lots of fruit, preferably seasonal fruits, and is not too sweet. After looking all over the net for a good recipe, and not finding any that I liked, I realized that I needed to create my own.
There is a wonderful tiramisu recipe that I have made for years (coming soon to the blog 😉) and I decided to use the same mascarpone / whipped cream combo as the base for this strawberry cream. Adding pureed strawberries gives the cream a delicious flavour and a beautiful colour. I used my favourite sponge cake recipe for the sponge part. Ever since this cake became one of two all-time family favourite birthday cakes, I inevitably end up making several of these every year. They are always a huge success!
Out of this world strawberry mascarpone cream cake
Ingredients
Sponge
7 eggs
140 g flour
140 g granulated sugar
1 tsp butter, margarine or shortening, and about 1 tsp flour to grease the baking pan
Strawberry cream
2 lbs or 900 g strawberries (2 boxes); ½ lbs or approx. 225 g goes into the cream, the rest go between layers and on top as decoration
While the sponge batter is in the oven, prepare the cream.
Place the mascarpone in a bowl, and with a hand mixer beat it for a couple of minutes until it is soft and fluffy.
In a different bowl whip the cream until gentle peaks begin to form; add the powder sugar and be careful not to over whip.
Take about a quarter (½ lbs-225 g) of the strawberries and puree them in a blender until smooth.
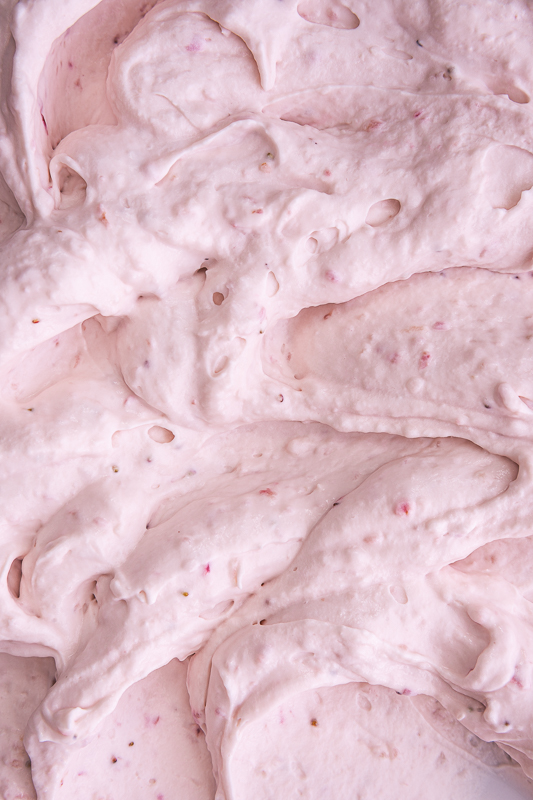
Mix the mascarpone and the whipped cream, and add the strawberry puree. Beat the mix together for a couple of minutes to get a fluffy texture. Adjust the sugar if needed.
Once the sponge cake is cooled down, slice horizontally to get 3 equal layers.
Take a cake stand and a frosting spatula, and put a tiny bit of cream in the middle of the stand. Place the top sponge layer upside down (inside part facing up) in the middle of the stand. Place about a quarter of the cream on the sponge and smooth it out with the spatula.
Then cover this layer of cream with thinly sliced strawberries, and place another sponge on top. Repeat the layers (¼ cream plus thinly sliced strawberries), and at last place the last sponge layer upside down on the other layers (inside part facing down).
Put another quarter of cream on the top and the last quarter on the side of the cake and smooth it in any style you wish with the spatula. Place the rest of the strawberries on top and side whole or sliced.
The cake is ready to serve, but place it into the fridge for a couple of hours to get the best result.
While the sponge batter is in the oven, prepare the cream.
Place the mascarpone in a bowl, and with a hand mixer beat it for a couple of minutes until it is soft and fluffy.
In a different bowl whip the cream until gentle peaks begin to form; add the powder sugar and be careful not to over whip.
Take about a quarter (225 g-½lbs) of the strawberries and puree them in a blender until smooth.
Mix the mascarpone and the whipped cream, and add the strawberry puree. Beat the mix together for a couple of minutes to get a fluffy texture. Adjust the sugar if needed.
Once the sponge cake is cooled down, slice horizontally to get 3 equal layers.
Take a cake stand and a frosting spatula and put a tiny bit of cream in the middle of the stand. Place the top sponge layer upside down (inside part facing up) in the middle of the stand. Place about a quarter of the cream and smooth it out with the spatula.
Then cover this layer of cream with thinly sliced strawberries, and place another sponge on top. Repeat the layers (¼ cream plus thinly sliced strawberries), and at last place the last sponge layer upside down on the other layers (inside part facing down).
Put another quarter of cream on the top, and the last quarter on the side of the cake, and smooth it in any style you wish with the spatula. Place the rest of the strawberries on top, side whole or sliced.
The cake is ready to serve, but place it in the fridge for a couple of hours to get the best result.
Leave a comment on the recipe page! Did you try this recipe? Let me and others know how you liked it by leaving a comment below.
Instagram – Did you make this or other recipe from the blog? Make a pic and share it with me onInstagram by tagging @realhungarianeatsand #realhungarianeats. I can’t wait to hear from you and see your creations!
Pinterest – You can find us on Pinteresttoo, if you would like to pin the recipe pics!
Hungarian gulyás (GOO-yash) or goulash soup is one of the most traditional and loved meals in Hungary. However, this hearty soup with home made noodles is not the same dish that people around the world call goulash! While goulash is a delicious beef stew without …
These simple and decadent Hungarian donuts are to die for. They never last long, as they disappear once they get to the table. Donuts are very popular in Hungary especially during the farsang /similar to carnival/ season (usually in January, February). They are called “farsangi …
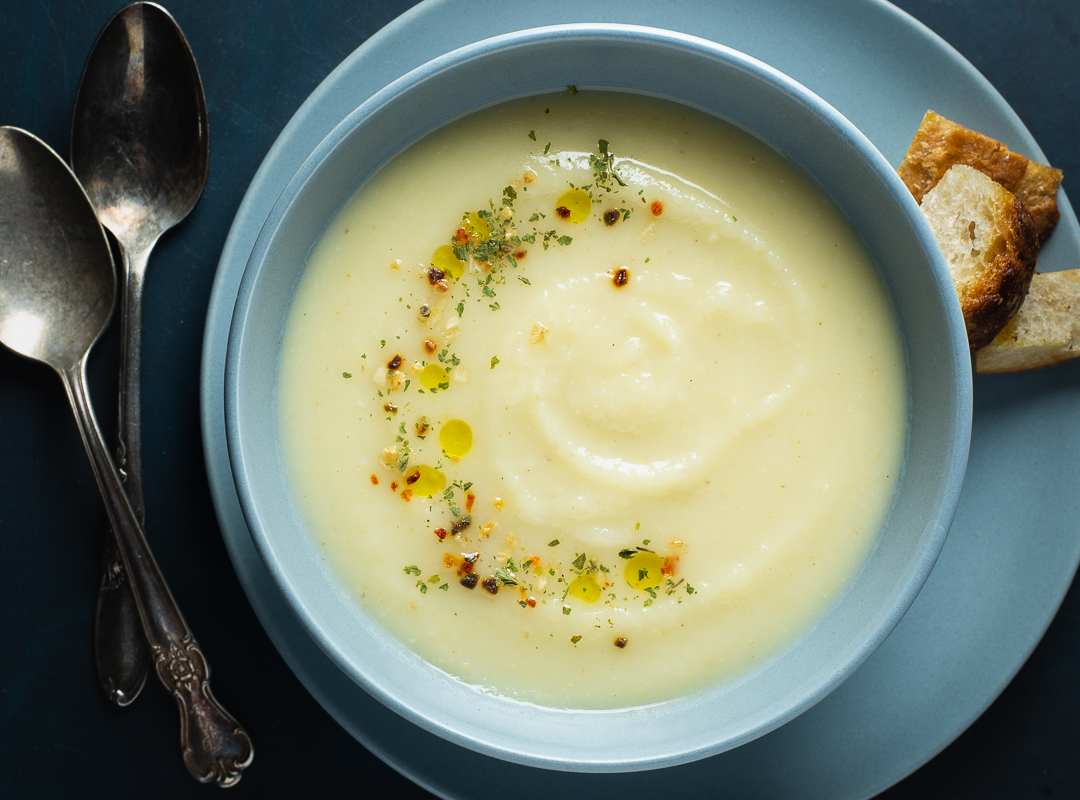
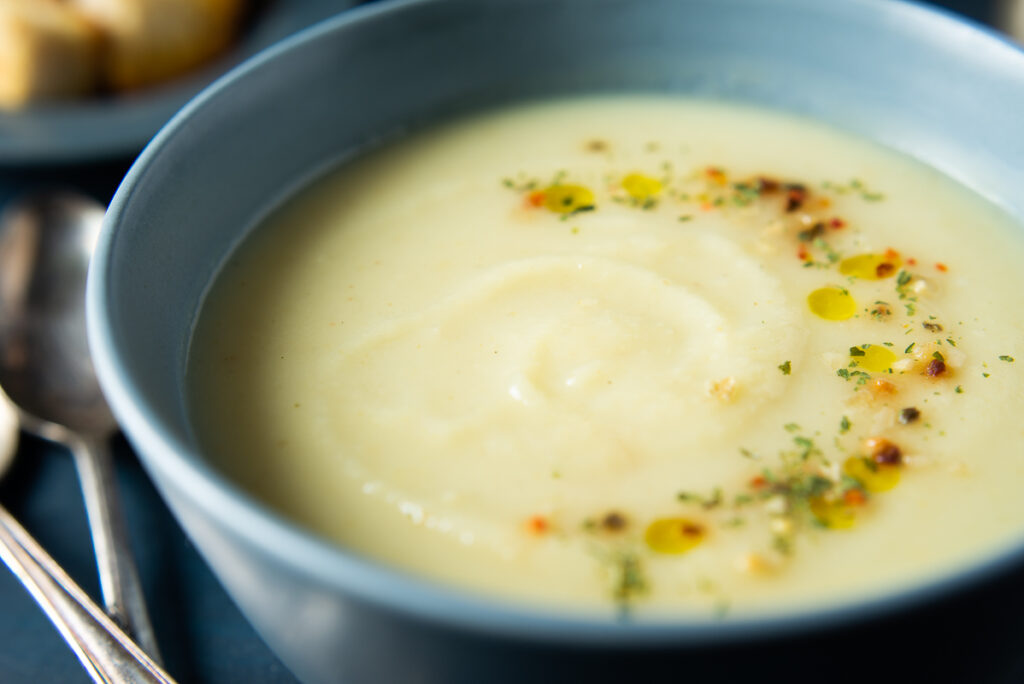
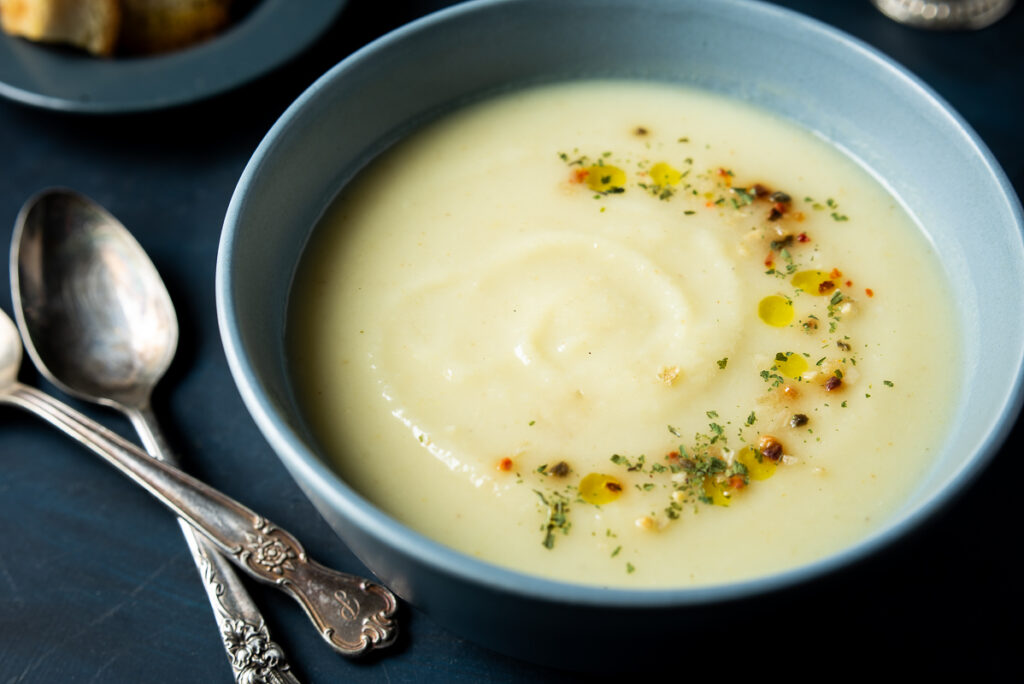
This oven roasted celery root soup is not only yummy, but it is very easy to make too. A little bit of time, a few ingredients, and a delicious soup is served.
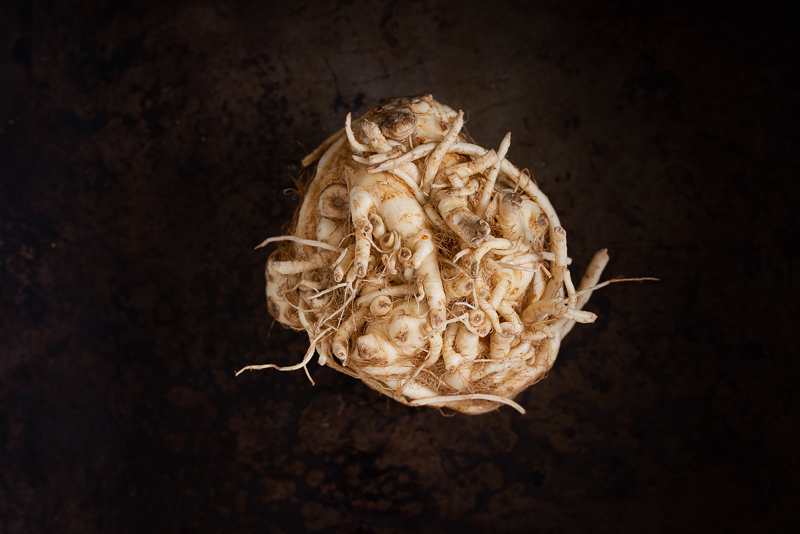
Celery root or celeriac is a variety of celery that is cultivated for its roots rather than its stalks. It can be used both raw and cooked. It has a more intense, earthy flavour than its “relative”, the green celery stalk. If properly stored, it can keep quite long, for about 10-14 days in the refrigerator.
For peeling it I usually use a knife rather than a vegetable peeler. It is easier to cut off the skin, knobs, roots, and clean some of the rougher spots.
Easy roasted celery root soup
1 medium to large celery root
1 medium potato
1 small or half of a medium size onion
1 garlic clove
1 tbsp olive oil
1 tbsp butter
4-5 cup vegetable bouillon or water
salt, pepper
Preheat the oven to 400°F /200°C
Wash, peel and cut the celery root into chunks. On a lined baking sheet toss the pieces with the olive oil, salt and pepper, mix, and spread it evenly. Roast it for about 20 minutes, or until it is slightly golden and fork tender.
In the meantime peel and cut the potatoes into cubes. Chop the onion and the garlic. On medium heat melt the butter in a medium pot, add the chopped onions, and sauté until golden.
Add the roasted celery root, garlic, potatoes, and the water or bouillon to the onion mix. Boil, then reduce the heat to low, cover and simmer for about 10-15 minutes until the potatoes are fork tender.
With a blender (either an upright or hand blender) puree the soup. You can find some tips here how to safely puree soup in a blender. You don’t have a blender? No problem. You can also use a strainer, or a potato masher.
Add a little bit more water/bouillon if the soup is too thick, and add some more salt and pepper and adjust the taste to your liking.
Serve it with some croutons and/or with some grated parmesan cheese. Jó étvágyat – Bon appétit!
Place the yeast and 1 tsp sugar into a small bowl, and add ¼ cup lukewarm milk. Stir, cover and set aside for about 10-15 minutes.
Using a standing mixer with the dough attachment mix the flour and the rest of the sugar. Add the yolks, the yeast-milk mixture, the melted butter, the lemon zest, the vanilla extract, a few drops of rum/rum aroma, and add the milk gradually until the flour mix forms a soft dough. The dough is good when it separates from the wall of the mixing bowl.
Form a ball, lightly flour the bottom of the bowl, and place the dough back in the bowl. Cover it with a kitchen towel or plastic wrap, and put it in a warm place (I preheat my oven to 200 °F/90-95 °C for 1-2 minutes, then turn it off) for about 45-60 minutes, until it doubles the size.
On a lightly floured surface roll out the dough to about ½ inch (1-1.5 cm). Cut out the doughnuts, and place them on parchment paper lined or lightly floured baking sheets.
Cover them with a kitchen towel, and let them rest in a warm place for another 20 minutes.
In a large heavy bottom skillet or dutch oven heat the oil (fill to about 1-2 inches deep). Fry the doughnuts until golden – about 1-2 minutes each side – on medium low heat, about 3-4 at once in the skillet. I usually cover the skillet for about a minute right after placing in the doughnuts, then uncover and continue to fry without it. I use long metal tongs for frying.
Once they are golden on both sides place doughnuts vertically beside each other in a paper towel lined large dish.
Sprinkle with icing sugar, and serve warm with some apricot preserves, plum butter, or any other kind of fruit spread. Bon appétit!
Notes
If you wish to make donuts with holes in the middle:•Before placing them into the oil, push down the middle of each donut, then fry them with the holes facing down first•Place some apricot preserves in the holes when serving
Leave a comment on the recipe page! Did you try this recipe? Let me and others know how you liked it by leaving a comment below.
Instagram – Did you make this or other recipe from the blog? Make a pic and share it with me onInstagram by tagging @realhungarianeatsand #realhungarianeats. I can’t wait to hear from you and see your creations!
Pinterest – You can find us on Pinteresttoo, if you would like to pin the recipe pics!
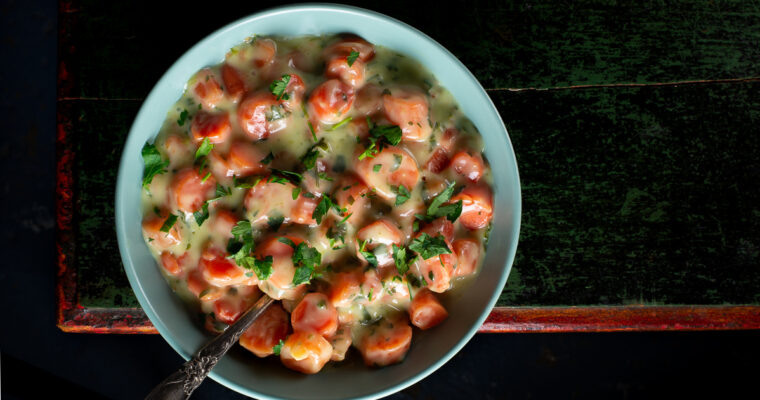
This delicious creamy carrot ragout (in Hungarian – “sárgarépa főzelék”) has all you need for a fast, easy and comforting vegetarian dish. Carrots are the perfect winter superfood with multiple health benefits. They are awesome either fresh or cooked, and available all year long. Did you know that …
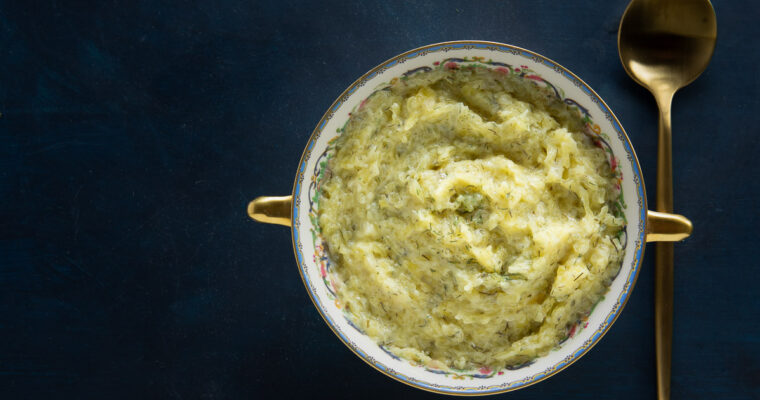
Delicious creamy spaghetti squash with dill. This wonderful veggie stew makes a perfect lunch or dinner. No wonder they are very popular in Hungary. Serve it as it is or pair it some fresh bread, with some hard-boiled or sunny-side-up eggs, frankfurters, meatloaf – or …
March into the holidays this year with these crunchy, coconut frosted booties! These chocolate cookie boots are not just super cute, but they are so easy and fast to make. It will be everyone’s favourite, including Santa :).
I found this cute and festive cookie recipe on Judit’s Hungarian blog – Szofika a konyhában. It is a perfect one to include kiddos in the cookie production process. My daughter loved cutting out the little boots with the cookie cutter, dipping the baked little booties into the white icing, and sprinkling coconut all over them at the end.
Thank you, Judit, for this lovely recipe!
Chocolate cookie boots
Dough
1 cup flour all purpose white, unbleached
½ cup butter 1 stick
1/3 cup icing sugar
¼ cup unsweetened cocoa powder
½ tsp cinnamon optional
1-2 tbsp cold water
Icing
1 cup icing sugar
1 egg white
Coconut cover
½-1 cup unsweetened shredded coconut
Preheat the oven to 180 C / 350 F.
Mix all the dough ingredients and make a ball from the dough.
Cover it with plastic wrap and place the dough into the fridge for half an hour.
Lightly flour a workplace, and roll the dough out with a rolling pin until approximately 1/4 inch thick.
Cut out the the cookies with a cookie cutter (if you don’t have a boot, any fun shape will do).
Place them on a lined baking sheet, and bake the cookies for about 10-12 minutes.
Once they are done, place them on a rack to cool down.
In the meantime make the icing. Beat the egg white, and add gradually the icing sugar.
First dip the top of the booties into the icing, then sprinkle it with coconut, and place them back on the rack to dry.
Leave a comment on the recipe page! Did you try this recipe? Let me and others know how you liked it by leaving a comment below.
Instagram – Did you make this or other recipe from the blog? Make a pic and share it with me onInstagram by tagging @realhungarianeatsand #realhungarianeats. I can’t wait to hear from you and see your creations!
Pinterest – You can find us on Pinteresttoo, if you would like to pin the recipe pics!
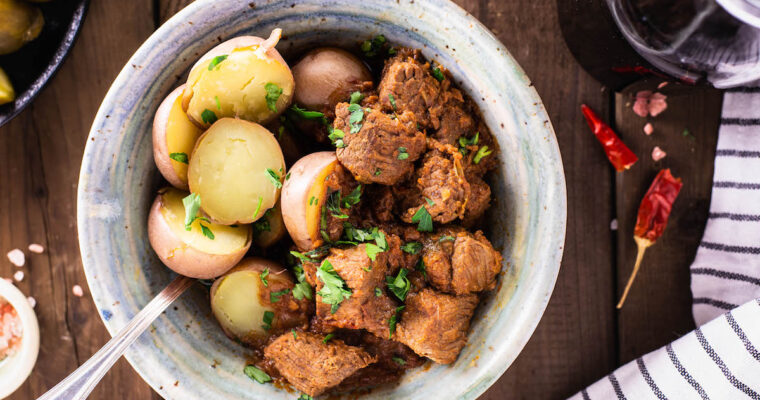
This classic Hungarian beef stew recipe is simple to make, it only needs a few everyday ingredients, and no matter when or for how many, it is going to be a hit and an all time favourite. But wait a single second – is this …